Table of Contents
Installing Trisul using Docker Image
This article helps you with installing Trisul Network Analytics using Docker Image.
1. Run TrisulNSM on a capture interface
Now you are ready to run TrisulNSM. Say you want to capture traffic from the port ens33 and store the results in /opt/trisul6_root just type.
sudo docker run --net=host -v /opt/trisul6_root:/trisulroot -d trisulnsm/trisul6 --interface ens33
 In the above command, notice that you mapped the volume using -v of the host directory /opt/trisul6_root. That is where all the persistent data is kept.
Logon on https://localhost:3000 and you can dive right in. Click on Trisul Docs:Basic Usage to get started.
2. Process a PCAP dump
- Trisul does a two-pass analysis over PCAP dumps. The First pass builds statistics, flows, packets, and resources.
- Then a second pass with Suricata IDS overlays the IDS alerts. This gives you full NSM visibility of both traffic and signature based alerts.
The following command processes the myPacketDump.pcap file located in the trisulroot.
sudo docker run --privileged=true  --name=trisul1a \
   --net=host -v /opt/trisul6_root:/trisulroot \
       -d trisulnsm/trisul6 --pcap myPacketDump.pcap
Notes on offline pcap:
- PCAP File Location The file myPacketDump.pcap has to be placed inside the shared volume /opt/trisul6_root volume so that the Docker image can see the outside file.
- privileged==true This option is required because the Trisul File Extraction feature requires root to create a RAMFS partition inside the docker container.
3. Start a Netflow Analytics instance
With just a single line you can start a TrisulNSM Docker instance to process Netflow v5/v9/IPFIX/SFlow using the –netflow-mode parameter.
sudo docker run  --net=host -v /opt/trisul6_root:/trisulroot \
        -d trisulnsm/trisul6 --interface enp5s0 --netflow-mode
In the above command, notice that you mapped the volume using -v of the host directory /opt/trisul6_root.That is where all the persistent data is kept.
Logon on https://localhost:3000 and you can dive right in. Click on Trisul Docs:Basic Usage to get started.
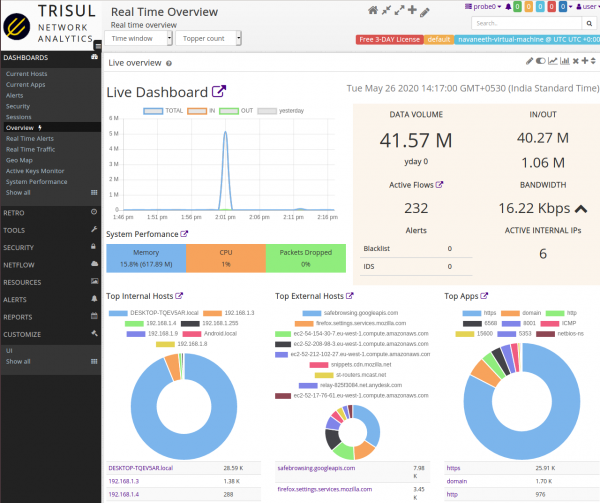
With the Netflow Pcap Dumped, The Trisul UI will look like this.

